
Approximately 7 minutes
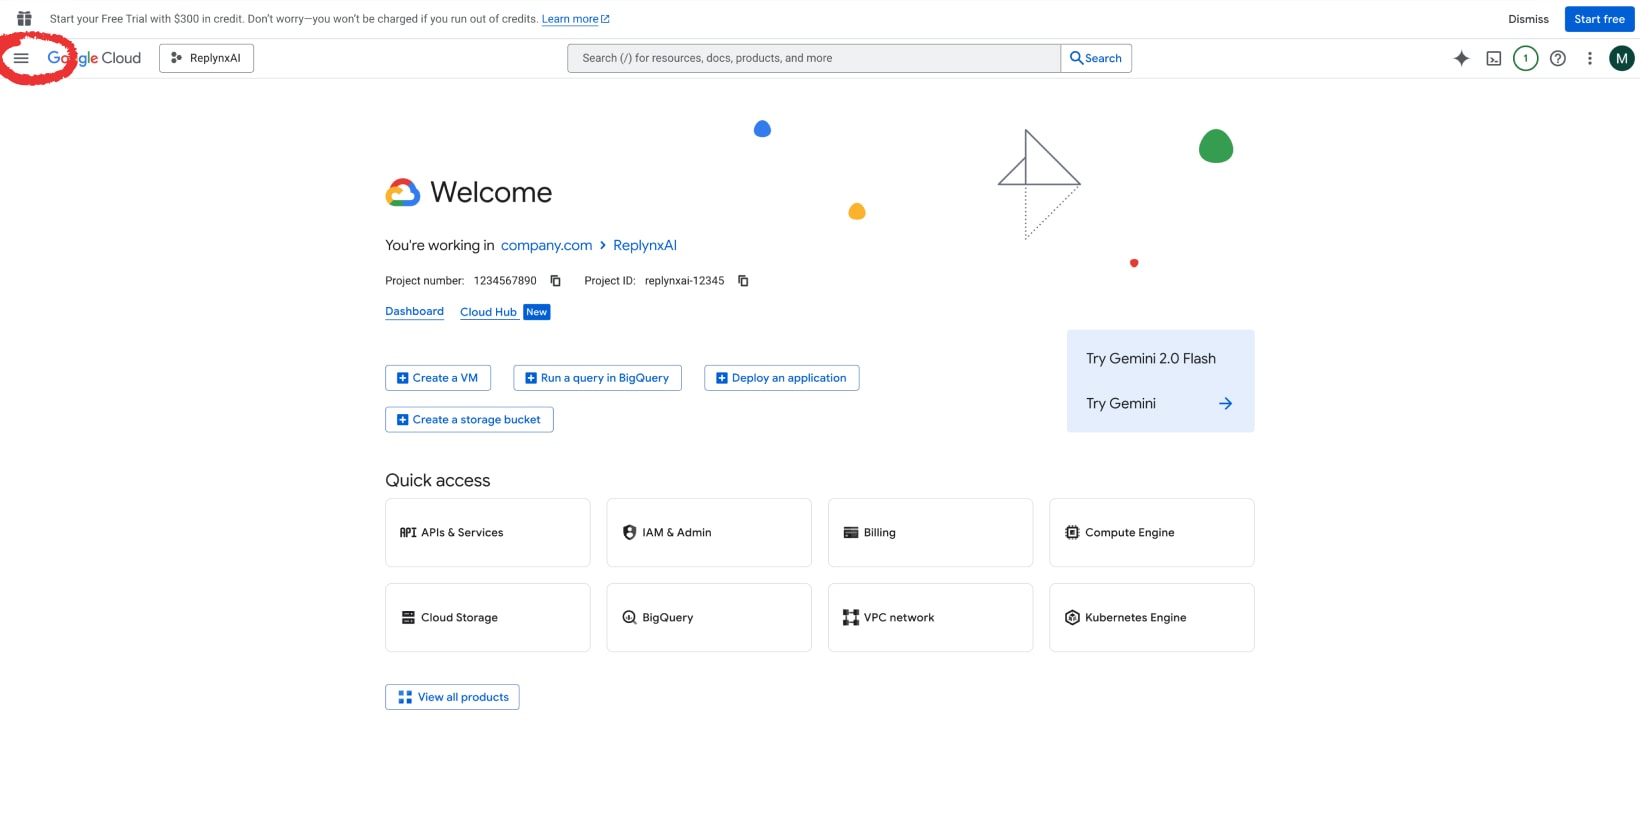
Log in to the Google Cloud Console (console.cloud.google.com) → open a project under which you want to add the service or create a new one and click on the ☰ Menu.
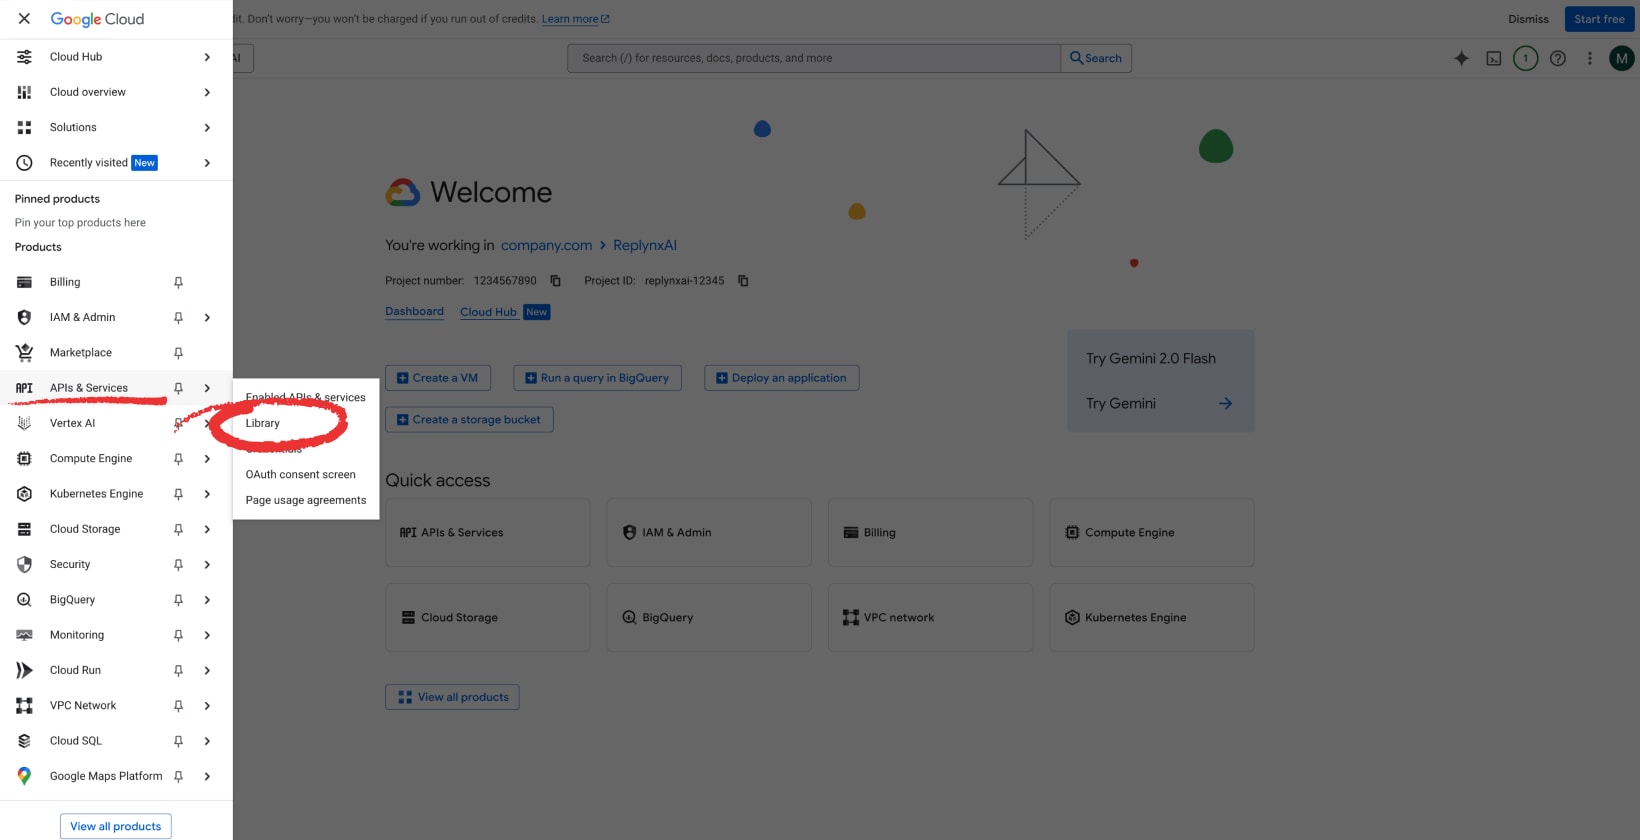
Go to APIs & Services and Library.
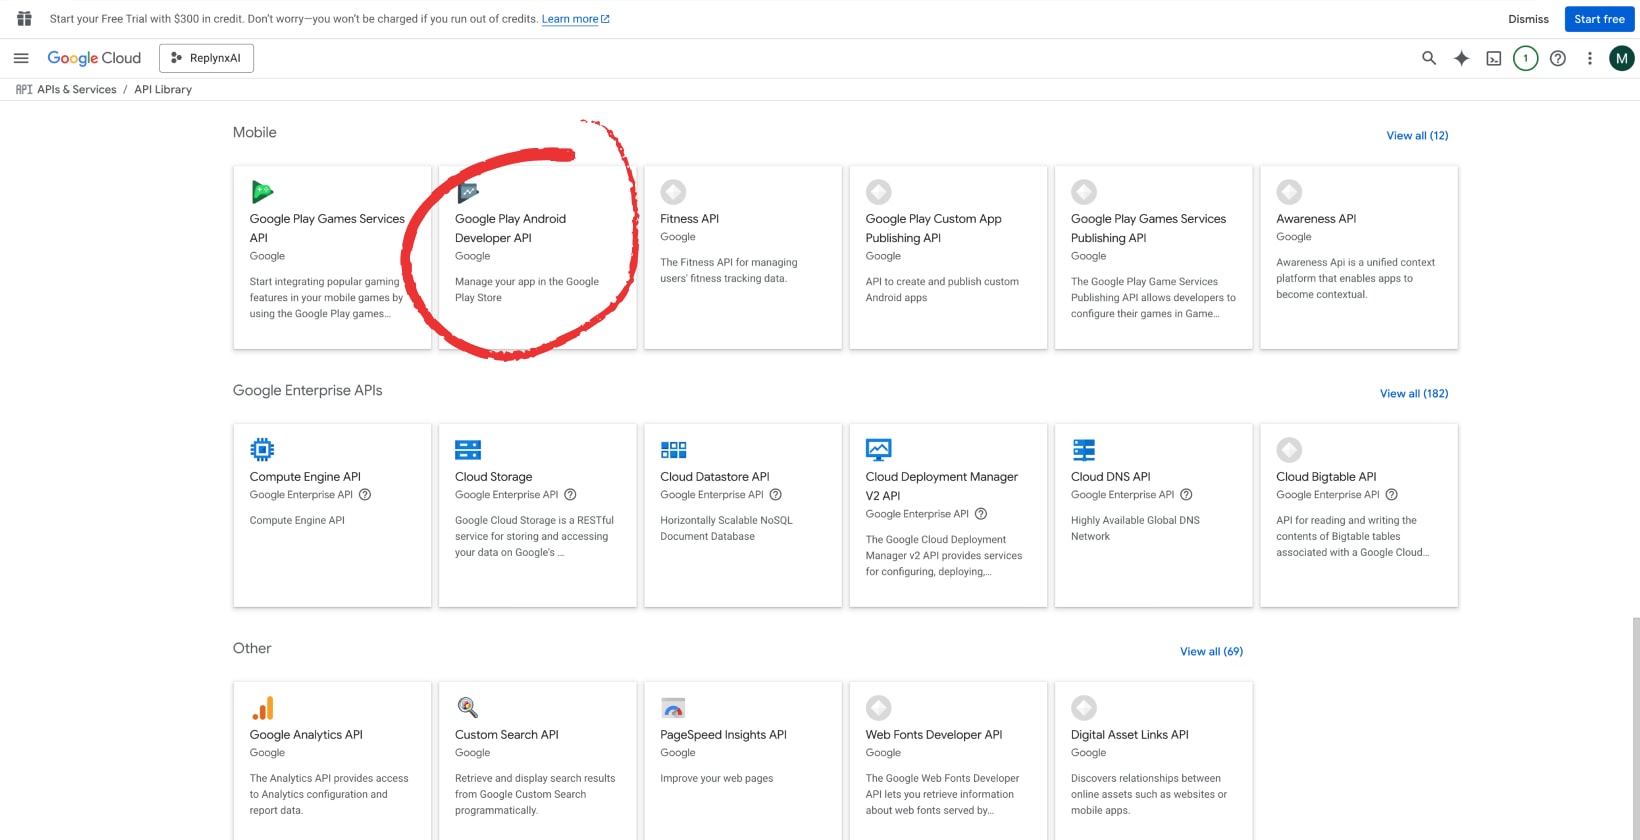
Find and select Google Play Android Developer API.
Click on Enable.

In the Google Cloud Console, open the ☰ Menu and go to IAM & Admin and Service Accounts.
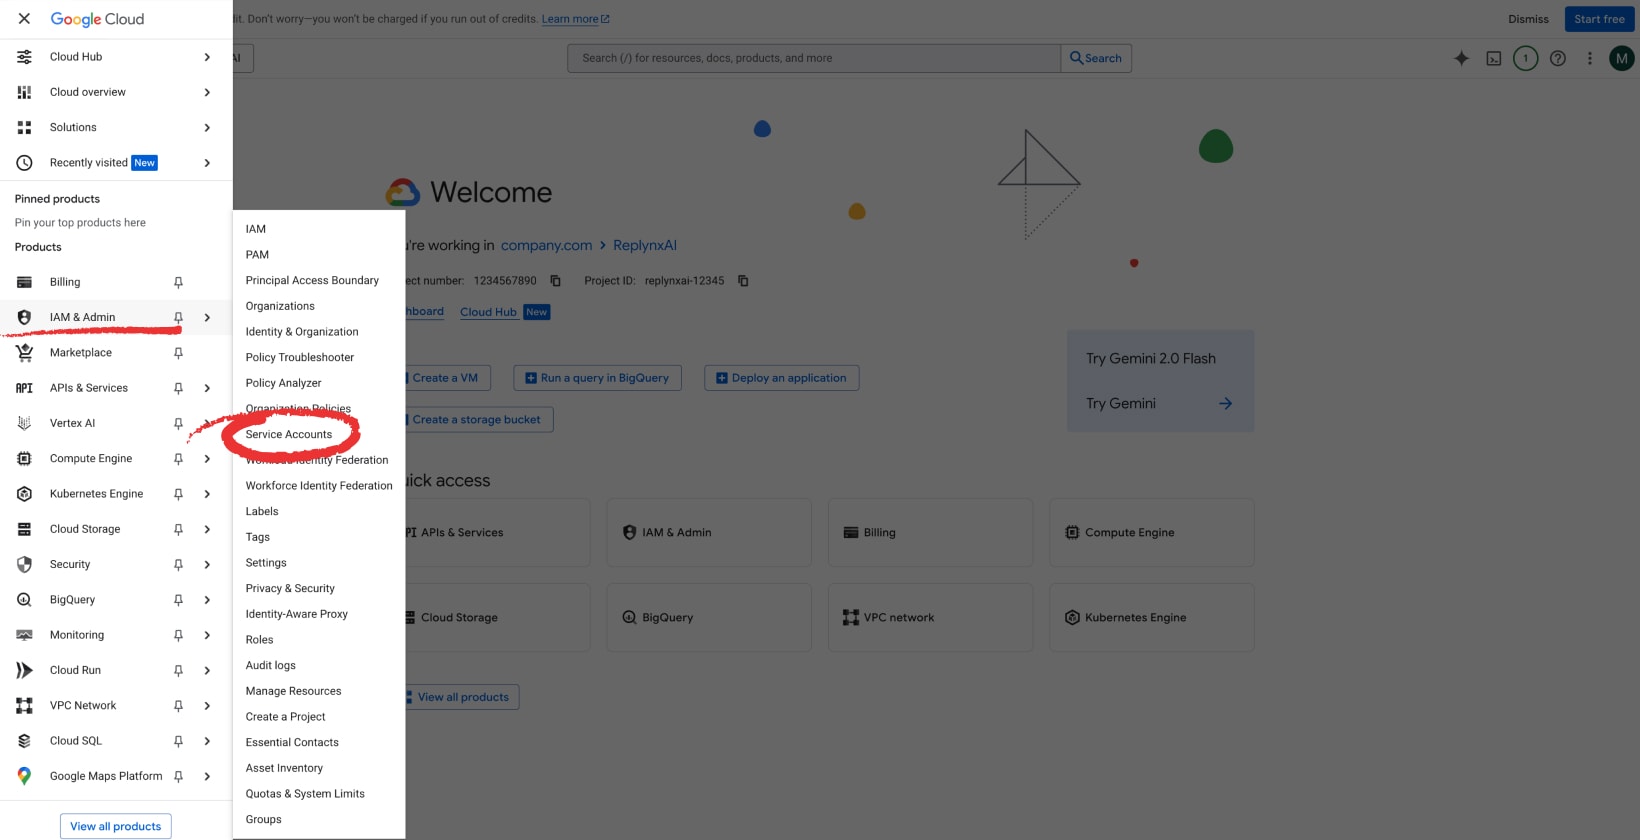
Click on + Create service account.

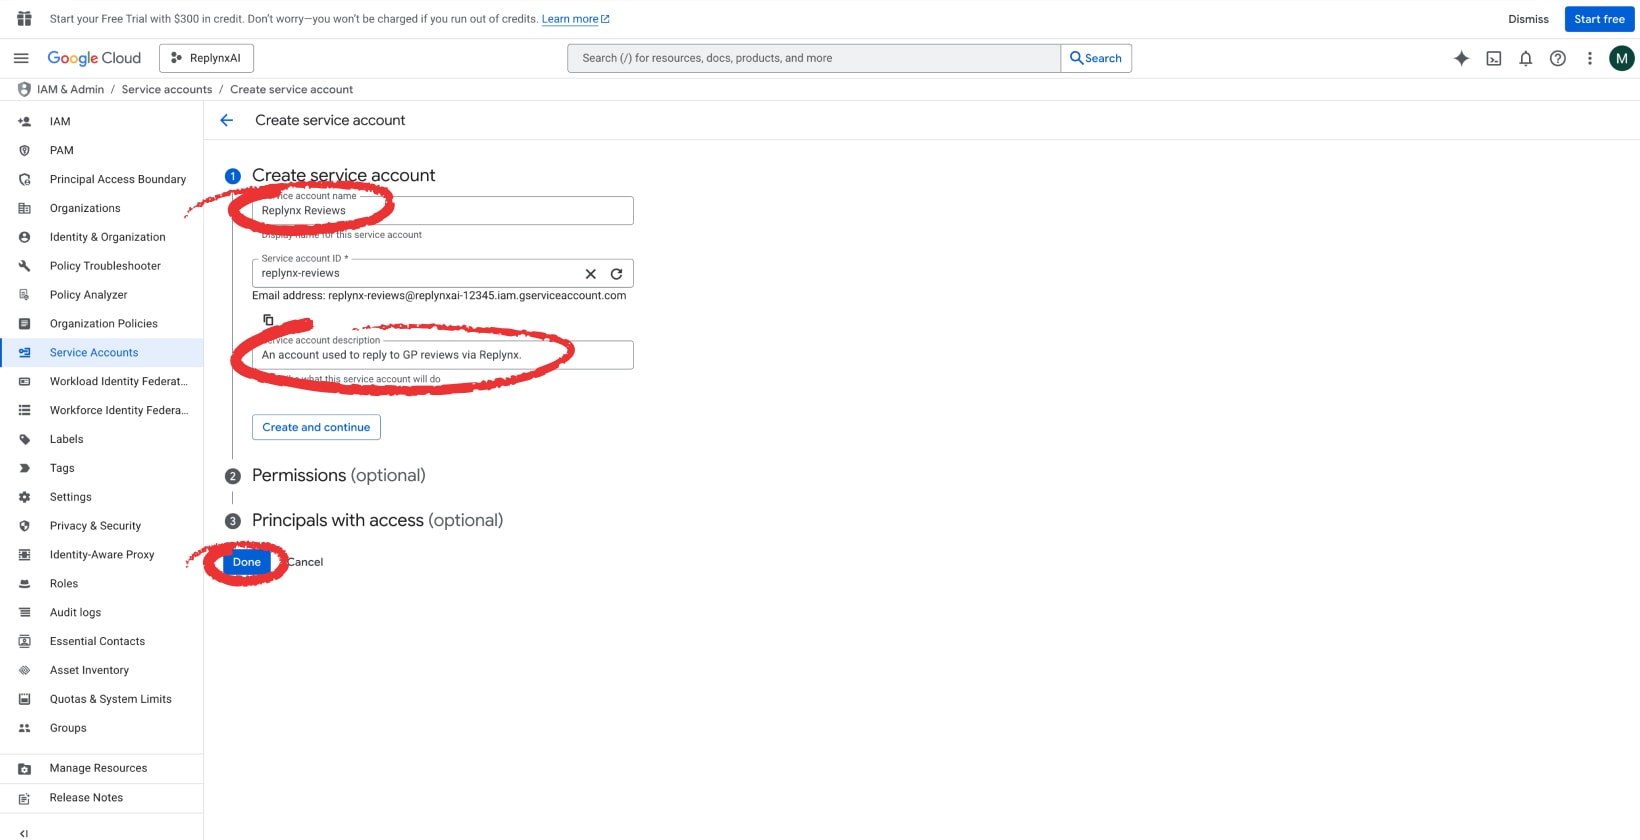
Fill in a unique account name (pick one that suits you) and a description. Click on Done (you can skip Permissions and Principals with access as they are not needed).
Find your newly created account in the Service accounts section, click on ⠇and select Manage keys.

Click on Add key and Create new key.
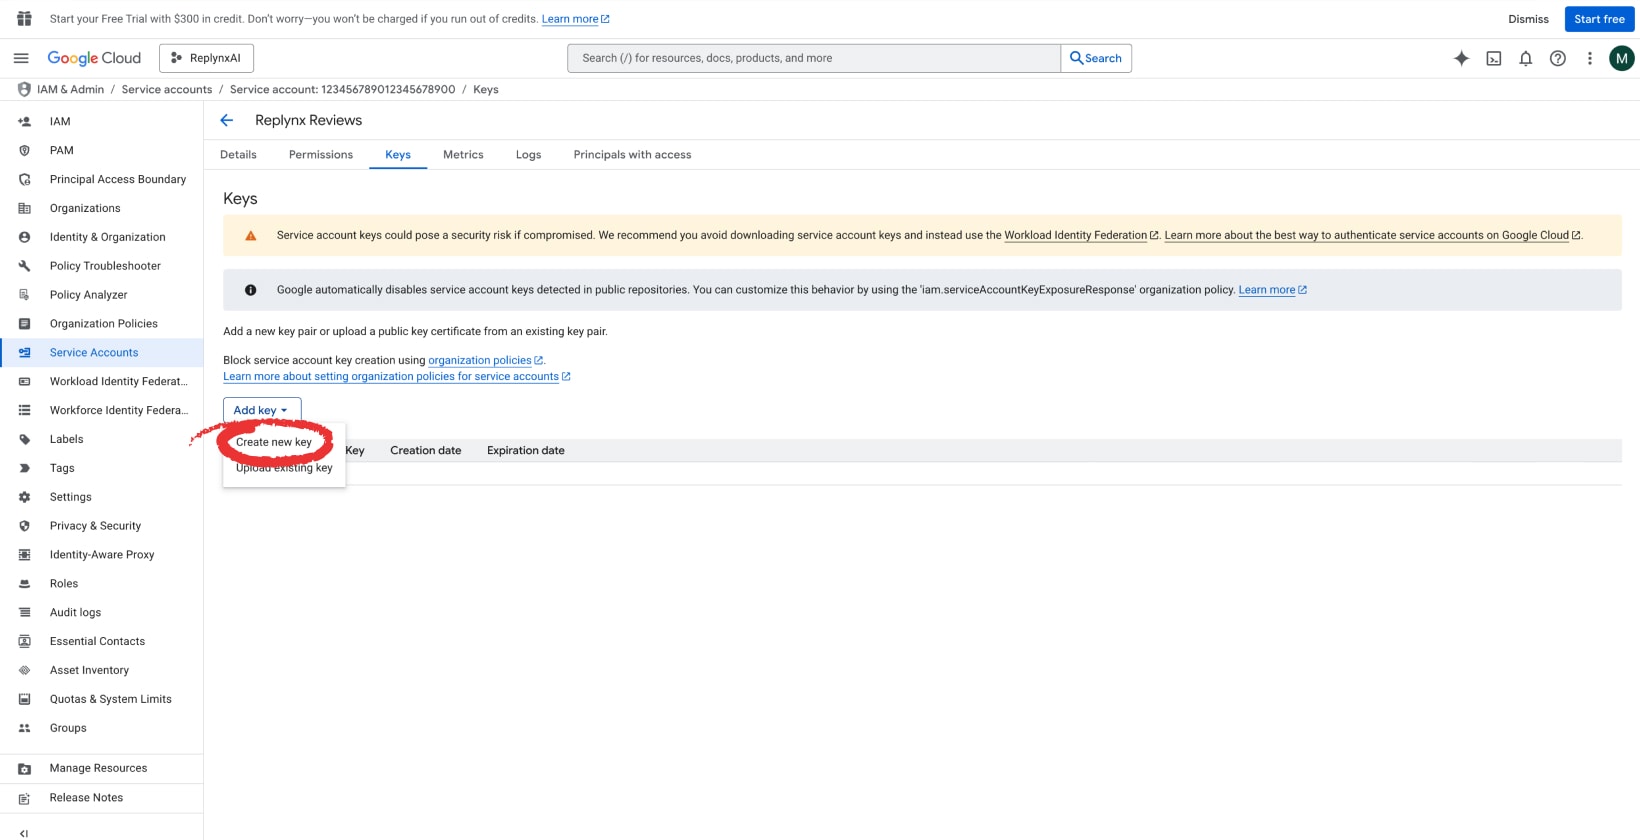
Select JSON and click on Create. A JSON file will be automatically downloaded. This file is to be uploaded into Replynx later.

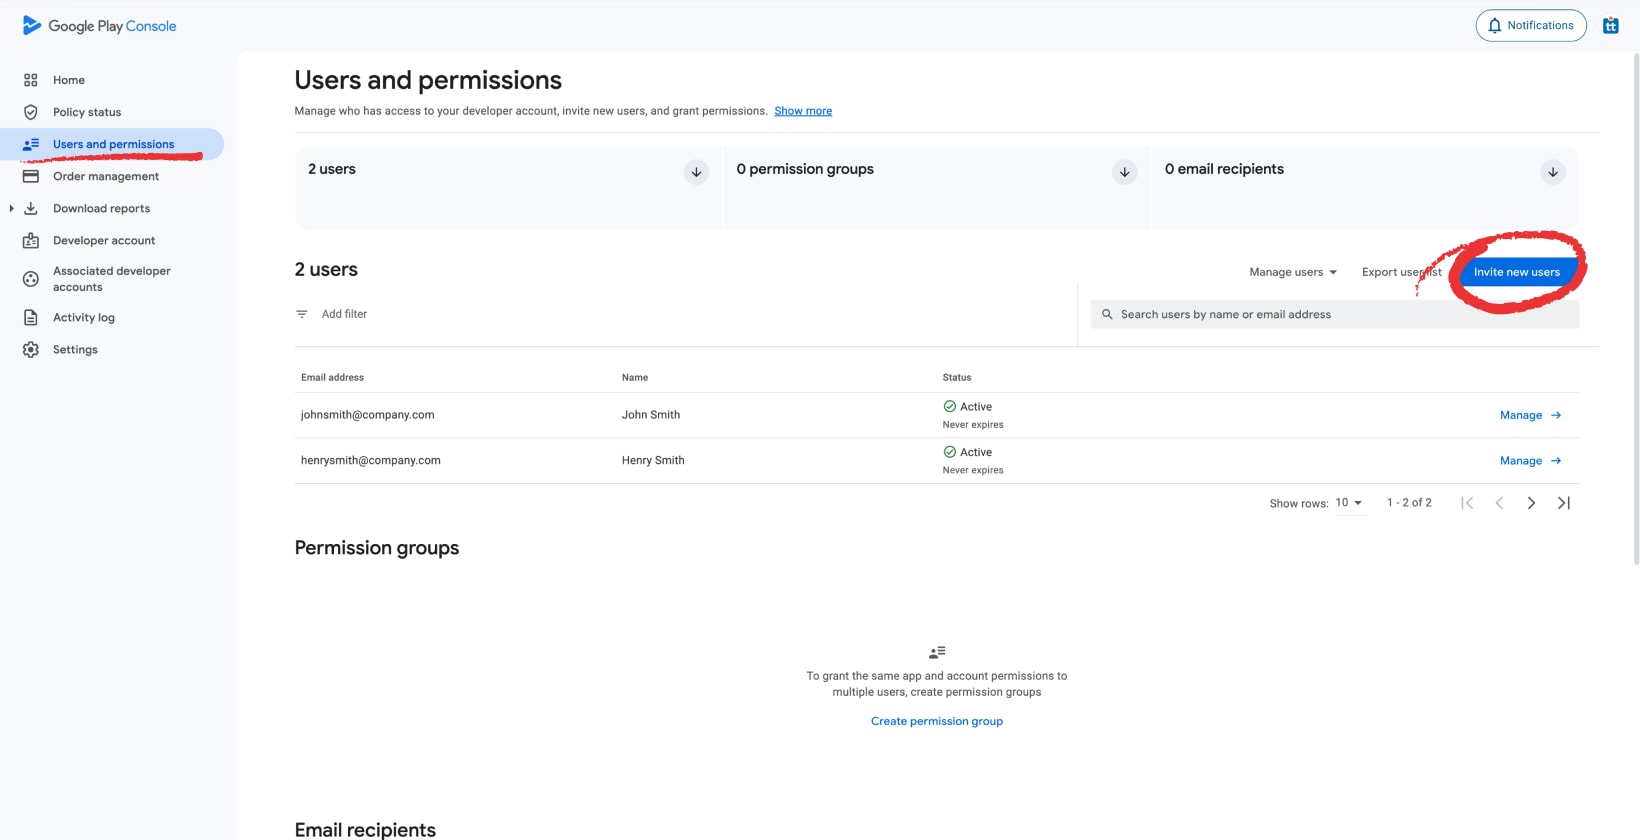
Open the Google Play Console, go to the Users and permissions tab, and click on Invite new users. You must have Admin or Account owner permissions.
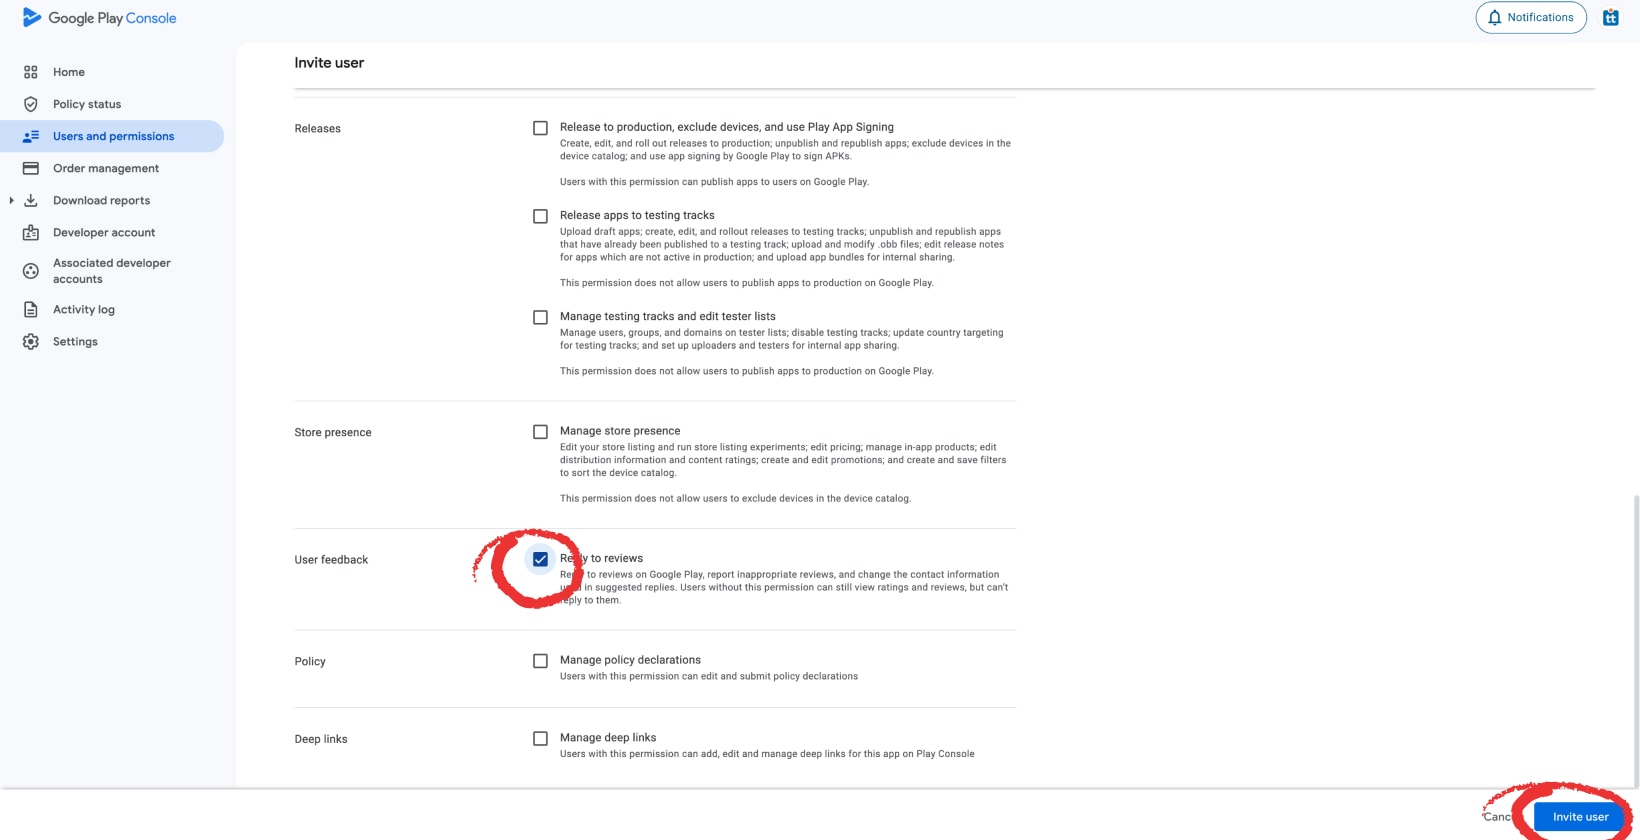
Fill in the email address of the Service account you just created in the Google Cloud Console. Find the Account permissions section. Check View app information and download bulk reports (read-only)... [scroll down]

...and check Reply to reviews. Click on Invite user.
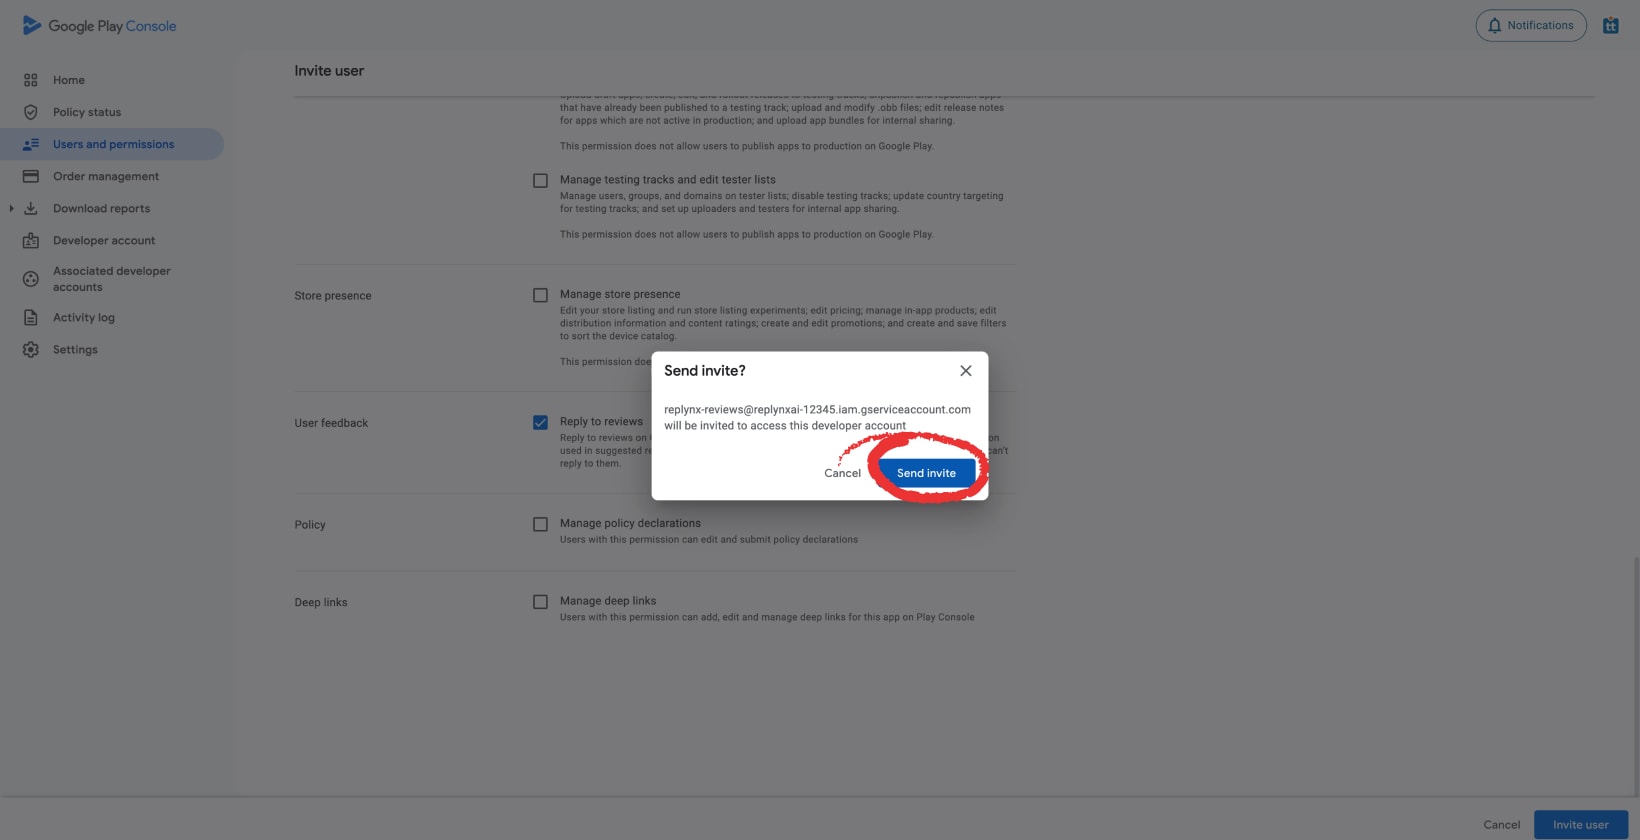
Confirm by clicking on Send invite. Since it is a Service account, the invite should be automatically accepted within a few seconds.
Go to your public developer page on Google Play. The easiest way is to: open Google Play in a web browser -> look up one of your apps -> open its page -> click your developer name (right below the app name).
Copy the entire URL of the page you land on. The URL will look like one of these formats:

Paste the Developer page URL (from Step 4) and upload the Service account key .json file (from Step 2) into Replynx and follow the on-screen instructions.
Guide Content